Dirty ears in a cat – What causes this and how to resolve it?

Introduction

If you’re a cat owner, you may have noticed that your feline friend’s ears can get quite dirty. While a small amount of ear wax is normal in cats, excessive buildup can lead to discomfort, infections, and other health issues. In this article, we’ll explore the causes of dirty ears in a cat. How to tell if your cat has ear mites or just dirty ears. And share tips for cleaning your cat’s ears safely and effectively.

Cat has scratches around the ears and there is debris in his ear canal.
Scratches around the ear and debris inside of it.

Causes of dirty ears in a cat:

Cats naturally produce ear wax to protect their ears from dust, debris, and other foreign objects. However, certain factors can contribute to an increased production of ear wax and excess ear wax buildup. Such as allergies, ear infections, and ear mites. Let’s take a closer look at each of these causes of dirty ears in a cat.

Allergies

Just like humans, cats can be allergic to a wide range of substances, including pollen, dust, and certain foods. When a cat is exposed to an allergen, their body may produce excess ear wax as a way to protect the ear canal from irritation. In most cases they also have an itch all over their body, especially in the head area. 

Ear infections

Bacterial or yeast infections can cause inflammation and discharge in a cat’s ears, leading to a buildup of wax and debris. Some common symptoms of an ear infection include shaking of the head, scratching at the ears, and a foul odor coming from the ears. U can use this ear-product to treat the ear infection that is the cause of the dirty ears in your cat. 

Ear mites

Ear mites are tiny parasites that live in a cat’s ear canal and can cause itching, inflammation, and a dark, crumbly discharge. If your cat is scratching at his ears frequently and has a black, coffee ground-like substance in their ears, he may have ear mites as a cause of the dirty ears in your cat. 

Ear mite seen under a microscope.

How to tell if your cat has ear mites or just dirty ears

It’s important to note that while ear mites can cause dirty ears, not all dirty ears are due to ear mites. Knowing the difference can help you determine the best course of action for your pet’s health. Here are some signs and symptoms to look for:

Ear mites

In addition to the black, coffee ground-like discharge mentioned above, ear mites can also cause redness, swelling, and scabs in and around the ears. If you suspect your cat has ear mites you can treat them with the following anti-mite treatment. Use this once a day for 7 days. Than stop for 7 days. And then again you apply it for 7 days. The reason is that the immature mites sometimes don’t die from a treatment. They grow up in the mean time. After the 14 days they have matured enough to die from the product, but they are too immature to reproduce themselves. At that time there are no resistant mites anymore. The dirty ears in your cat will resolve. 

Dirty ears

If your cat’s ears simply have a buildup of brownish-yellow wax, it may just be dirty ears. You can clean your cat’s ears at home using a cat ear cleaner, cotton balls or pads, and q-tips (if desired), as we’ll discuss in the next section.

How to clean dirty ears in a cat:

Cleaning your cat’s ears is an important part of their overall grooming routine. It helps to prevent ear infections and keeps your cat’s ears healthy. Here’s how to clean your cat’s ears safely and effectively:

Step 1

Gather your supplies. You will need a soft cloth like a gauze pad, an ear cleaner suitable for cats and q-tips with a big tip. 

Step 2

Hold your cat firmly, but do not do this too tight. The stronger you will hold him, the more he will try to get loose. Gently wrap your cat in a towel or blanket to keep them from moving around if necessary. Hold their head steady with one hand while you clean the dirty ears in your cat with the other. Use the gauze pads to remove as much dirt as you can. 

Step 3

Apply the ear cleaning solution. Follow the instructions on the bottle carefully, as different solutions may have different application methods. Apply a “sqeeze” of the solution into your cat’s ear canal. If you use to much it doesn’t harm your cat. But he will start shaking his head and the cleaner will fly around against your walls or furniture. So don’t use too much. The dirty ears in your cat will be cleaner, but your walls need to be painted again…

Step 4

Massage the base of your cat’s ear. Gently massage the base of your cat’s ear for about 30 seconds. This helps to loosen any dirt or debris that may be stuck inside. You probably will hear a “tsh-tsh-tsh” sound from the cleaner in the ear while doing this. 

Step 5

Wipe away the debris. Use a gauze pad or Q-tip to wipe away the debris and excess cleaning solution from your cat’s ear. Do not go too deep into the ear canal, as this can cause damage.

Step 6

Repeat on the other ear. Follow the same steps on the other ear. 

big ears in a cat.

Conclusion

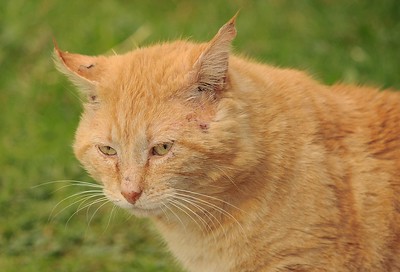
Keeping your cat’s ears clean and healthy is an important aspect of pet care. By understanding the causes of dirty ears in a cat, knowing how to clean them safely and effectively, and taking steps to prevent ear problems, you can help ensure your cat’s overall well-being. Remember to always consult with a veterinarian if you have any concerns about the dirty ears in your cat.